Search This Blog

Saturday, October 29, 2022

Rapid Prototyping as CS Assessment (Design Thinking in CS)

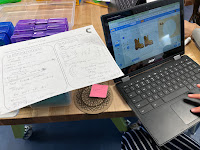
Student prototyping in Scratch and using partner interview notes to guide design.
As my first round of 5th graders wrapped up their computer science elective last week, we spent the last two days of class with a culminating project-- the Design for a Partner sprint. Integrating design thinking in computer science has been a powerful way of giving students a meaningful and authentic purpose for their work and a chance to demonstrate what they've learned in our class. 
During our 5th grade design sprint, students were challenged to interview a partner to get to know more about their typical school day-- how their morning starts, how they move through their day, and after school routines-- and then rapidly prototype a technology-based innovation to help with a challenge in their partner's day.

diagram of the design thinking process

What is design thinking?

Design thinking is an empathy-based, human-centered, problem solving process and mindset. Design thinkers focus on user research, needfinding, and setting aside our own assumptions about the world. It is the mindset in which we design instruction at the TK-8 school in which I work-- Campbell School of Innovation.

Design thinking in CS

As an interviewer, their goal was to seek opportunities for design while talking to their partner. Were there problem spots in the day that they might design around? Or something new that they learned about their partner? Could they design with the intention of making their partner smile?

Design for Partner sprint (two 50-minute class sessions):

  • Interview -- 2 minutes to interview your partner and learn as much as you can about their day.
    Focus on asking follow-up questions to get more information.
  • Needfinding -- where do you see opportunity for design? Problem to solve? Design something to make your partner smile?
  • Ideate -- 2 minutes to brainstorm (sketch or write) 3 or more technology-based innovation ideas for partner
  • Plan -- sketch your prototype with as much detail & pseudocode as you can (5 minutes)
  • Rapid Prototype -- choose the best innovation idea for partner, then rapidly prototype using one of the tools/skills we learned in computer science (in this case, Scratch, Python or Circuit Playground Express)
  • Share & digital gallery walk -- "present" to your partner by posting your creation with a description in our Seesaw learning portfolios

CS + Design outcomes


From hairstyle/clothing-picker apps to automated pet feeders, bedroom alarm systems to customized video games, and emotional regulation apps, students blew me away with how thoughtful & creative they were in their designs. 

This project-based format gave me an opportunity to see whether students could apply some of their CS learning in an authentic way. In this format, students are not graded on how well they can code. Rather, I am more interested in their planning and understanding of concepts that we've covered-- can they identify a coding concept that might be useful in their prototype & can they find relevant resources to support that plan?

Integrating design thinking mindsets into my students' computer science work also allows them to think about how they might apply their skills in the future, and how various computer science skills can be used not only to make fun things, but also to make things that can help others.

Subsequently, many students did find themselves learning new programming & making skills in the process. As they were planning their prototypes, they found inspiration in MakeCode or Scratch tutorials and integrated what they already knew how to do with new ideas and techniques they may not have used before, allowing for a personalized learning experience wrapped into an assessment piece.

Monday, November 22, 2021

Raspberry Pi Pico Plushy Nightlight for Baby

Toward the end of September, as autumn arrived, the weather started to change, the days became shorter and the nights became longer, we took our 2 1/2 month old son out one evening for a ride in the car. We noticed that as it started to get darker outside, and baby boy could no longer see anything in the car, that he started to whine and fuss until we turned a light on in the backseat.

And so, I decided to try and use my new Raspberry Pi Pico microcontroller to make a plushy nightlight for baby boy's car seat.


The Brainstorm

Plans sketched out on paper for Raspberry Pi Pico Pillow prototype
My goal was to use a light dependent resistor to create a pillow that would sense the light levels in the car and signal the LEDs in the pillow to light as it got dark outside.

I'm a decent sewer, but not an expert by any means, so I had to keep the design simple. My original goal of sewing the plushy into some cute shape was quickly scrapped and replaced with a basic rectangular pillow shape, with a pocket on the back for holding a battery pack, and LEDs sewn inside to shine through the fabric. 

I also planned on sewing velcro straps onto the back of the plushy so that I can hang it on baby boy's car seat or stroller.


Process

This was my first Pico project and I was really happy to find that both the "Getting Started with Raspberry Pi Pico" guide on the projects.raspberrypi.org page and with the Getting Started with MicroPython on Raspberry Pi Pico book made it incredibly easy to learn how to program the Pico. I was up and running in minutes, blinking my first LED! 

Coding

  • Once I had my first LED blinking, I started playing with PWM so that I could pulse the lights in my
    pillow. 
  • Then, I researched how to program a photoresistor (LDR) using MicroPython. I'd never used a photoresistor successfully before on my Raspberry Pi 3s, but I found a really simple tutorial online that helped me to get the photoresistor connected and programmed on the Pico fairly quickly.
  • With my LEDs pulsing and my photoresistor sensing, I put both programs together into my final project. I created a function for "twinkling" lights and a function for "no twinkle", then programmed the Pico to pulse the LEDs on/off randomly depending on the level of light in the area. 


Soldering

  • Used needle-nosed pliers to bend LED legs into loops.
    Up to this point, my LEDs were loosely connected to the jumper cables by sliding the LED legs into the female ends of the cables. With everything running smoothly I decided to go ahead and solder all the cables and LEDs together for a more permanent connection.
  • This was my first time soldering LEDs to cables, so there was a bit of a learning curve for me. First, I stripped the cables. Then, for the purpose of sewing the LEDs into the pillow, I used needle nosed pliers to bend the legs on the LEDs into the circles, and wrapped the jumper cable wire around the legs of the LEDs. 
  • Soldered jumper cables onto LEDs
    I also bent the legs on the photoresistor in a similar fashion and wrapped the jumper cables to the LDR & its resistor in the same way. 
  • Finally it was soldering time. Not having done a ton of soldering in the past (aside from soldering leads onto Raspberry Pis) this was a great learning opportunity for me. I ended up with some messy cables, but they all work! 
  • Later on I found a great & simple tutorial on YouTube with some practical tips for a cleaner & maybe easier way of soldering together jumper cables and LEDs that I want to try next time.
(Yes, I could have purchased pre-soldered jumper cables & LEDs, or sewable LEDs and conductive thread, but when I dreamed up the project, the goal was to prototype the pillow using what I already had around and not to spend a lot of money on new materials.)


Sewing

  • Sewing commenced next, and this is when the project got more complicated. I didn't want to buy a whole bunch of new materials, so I stayed away from expensive conductive thread and (after some searching online for LED sewing tips) played with ways of using regular diodes and sewing them into my pillow. 
  • Sewed LEDs onto the fabric using the looped legs & thread
    I am also not a master sewer (I know enough to put together some basic projects, and a Halloween
    costume from time to time), so please excuse the not-so-pretty stitch work. After getting the LEDs sewn into patterned fabric, I sewed the pillow backing to the front along one edge (by hand unfortunately, as I do not have a sewing machine at home).
  • Luckily I was able to schedule time at my mom's house where there is an actual sewing machine. It was there that I realized that sewing in my pocket would be easier with the front and backing separated, so I tore out all of stitches to start again. 
  • Sewing a button hole

    I also decided that a button hole might allow me to run a power cable from the pocket into the microcontroller inside the pillow, so I learned how to sew a button hole with the machine, then attached a pocket to hide the hole, and finally I sewed the pillow backing onto the front, leaving the bottom open for stuffing.
  • I used standard polyester crafter's stuffing to stuff the pillow, making sure that the Pico microcontroller was still easily accessible. 
  • Then (home again with no sewing machine, sadly) I hand-sewed a hem on the bottom edges of the pillow before then sewing the edges together. However, after closing up the pillow, I decided that I wanted to still be able to access the Raspberry Pi Pico inside, to update the code or in case of troubleshooting, so I ripped out the stitches and started again, this time leaving a small opening and attaching Velcro connectors that I could use to open and close the pillow.

Pico & stuffing inside pillow Photoresistor sewn into corner of pillow Pocket sewn on back of pillow Cable inside of pillow, strung threw button hole


Final Product

I didn't end up sewing the straps on the back of the pillow, but may go back and add those later on. I also would like to find a smaller battery pack to run the microcontroller, that is more easily hidden in the outside pocket, but otherwise I am happy with the way this first attempt turned out. 

The pillow is small enough for baby's stroller and car seat, and adds a nice, soothing lighting effect to the back seat of the car when the sun goes down.

 Velcro opening Pillow in car seat Pillow in crib with LED lit


Resources


The Code

from machine import Pin, PWM, ADC

import random

from time import sleep


photoPIN = 26

blue1 = PWM(Pin(20))

white1 = PWM(Pin(16))

blue2 = PWM(Pin(14))

white2 = PWM(Pin(11))

blue3 = PWM(Pin(7))

white3 = PWM(Pin(3))


blue1.freq(1000)


def readLight(photoGP): #function to access photoresistor

    photoRes = ADC(Pin(26))

    light = photoRes.read_u16()

    light = round(light/65535*100,2)

    return light


def twinkle(): #function for twinkling lights


    light = [blue1, white1, blue2, white2, blue3, white3]


    for i in range(10):

        pulse_light = random.choice(light)

        for duty in range(65025):

            pulse_light.duty_u16(duty)

            sleep(0.0001)

        for duty in range(65025, 0, -1):

            pulse_light.duty_u16(duty)

            sleep(0.0001)


def no_twinkle(): #function to turn off all LEDs


    light = [blue1, white1, blue2, white2, blue3, white3]


    for duty in range(0):

        light.duty_u16(duty)

        sleep(0.0001)


no_twinkle() #start with all LEDs off


while True:

    print("Light: " + str(readLight(photoPIN)) +"%")

    light = readLight(photoPIN)

    if light <= 5:

        print("It's dark... let's twinkle some lights")

        twinkle()

    else:

        no_twinkle()

    sleep(1)


Friday, April 9, 2021

"BUG Books": student-designed design work

Inspired by one of Stanford's design school classes, I recently launched the second year of "BUG books" with my 2nd grade students. The process starts with students sketching or writing a list of as many things as they can think of that bug or annoy them. Once students have a fairly extensive list generated, we shift mindsets and look at our lists as opportunities for design. Students then choose 1 "bug" to focus on, turn it into a "how might we"-style research question, research currently existing solutions for that challenge or problem, and then ideate their own innovations or solutions for improving the issue.

The "BUG books" have quickly become one of my favorite units of work each year, as this project-based approach to learning provides authentic experiences for students and integrates academic skills in a meaningful context that keeps students engaged. And because of student's connections to the topics, the quality of student work, and effort put into each phase, is so much greater than we would see on a more "traditional" assignment or worksheet.


Empathy & insight

While it's easy to assume that students this young might tend toward more superficial topics for their research, prompting students to think about topics that really bother them, versus just topics that they are interested in, has led to more meaningful and impactful work. Their choice of topics has been incredibly insightful for myself and my team; we've learned a lot about our students based on the work they've designed. In the last two years, our 2nd grader's research questions have addressed everything from anxiety to bullying to inclusion to mental & physical health issues, such as: 
  • "How do I stop biting my nails?"
  • "How do I make more friends?"
  • "How do I get my sister/brother to play with me more?"
  • "What can I do about my allergies?"
  • "How do I help my family stop fighting so much?"
  • "How do I help myself get up earlier in the morning?"
  • "What do I do about bullies?"
  • "How do I stay safe from germs?"
  • "How can I make school better/enjoy school more?"

Research & digital literacy skills

For our young students, this is the first major research project any of them have worked on, so we integrate mini-lessons on the skills they'll need for the work. Topics include:
  • Where do we research?
    • We generate a list whole group of where we go to learn things (not just the Internet)
    • We teach them about search engines & start them off with "kid-friendly" and teacher-vetted search engines... and then if they cannot find what they need, they can venture off onto Google
  • Reliable resources
    • How to vet your resources (especially online)
    • How to cross check information that you read online
  • Crafting search terms for web searches
  • How to read for information
    • Up to this point, literacy in K-2 has leaned heavily on "learn to read" & not as much on "read to learn"
    • We also discuss how to use our text features to help us locate information we need in a long article
  • How to take notes
  • How to write about what we learn
    • Summarizing versus plagiarizing
    • Creating topic sentences in our writing

Thinking like design thinkers

Once students have formulated their research questions and collected information about the problem, as well as existing solutions or recommendations, we dive into our design work. 
  1. Define → Students analyze what they have learned in their research.
  2. Ideate → Students brainstorm as many ideas as they can for either innovating an existing solution OR creating their own solutions
  3. Prototype → Students choose 1 innovation from their brainstorm (the one they think is the best or has the most potential for being helpful) and prototype that solution
  4. Test → Students test the solution they prototyped and collect data on it's effectiveness
  5. Reflect & repeat → Students reflect on their tests and reiterate on their designs as needed
Unfortunately, last year's design work was interrupted by COVID-19 school closures and so we never made it beyond the ideating phase. This year, I look forward to moving students through the entire design process, and seeing what ideas they choose to prototype and test in an authentic situation.

The design model includes noticing & empathizing, defining, ideating, prototyping, testing, reflecting


Modifying for a blended class setting

As I mentioned, our school site closed unexpectedly last year due to the COVID-19 outbreak. School shifted to a full time online format from March 2020-March 2021, and so much of our design work had to itself be redesigned. What typically launched as a project involving a lot of brainstorming and sketching on paper needed to change for this year's launch. Below is a list of ways that we redesigned our "BUG books" and design work for a blended or online model:

    • example of a bug list started on paper & uploaded into Jamboard
      We used Jamboard to launch our "bug lists" this year. Students could either sketch or write on
      screen OR keep a list on paper and then upload a photo of that paper into their Jamboards

  • Google Classroom

    • I used Google Classroom to manage each piece of the project instead of pushing out 1 large packet of work like we did previously
    • Because "bug lists" are an ongoing project (we took 2 weeks just to populate our lists), I would set a due date on the assignment, and then extend the due date and manually move the project up on the Classwork tab each time students were "reassigned" to add more to their lists. The moving due date ensured some accountability and that students didn't wait until the end of the 2 weeks to start their lists.

  • Clever

    • Clever is a single sign-in system our district uses that also allows us to create landing pages for frequently used apps
    • I created a custom page and section in my Clever account where students could find links to vetted websites for starting their research

  • Flipped mini-lessons

    • I used Screencastify to create mini-lessons on everything from created a bug list to writing a research question to modifying search terms and more. Students were assigned to watch these lesson first on their own time and start their work independently. 
    • During our live sessions (either online or now in-person during our hybrid class model) we can jump right into reviewing what work they've done so far and then customizing the days lessons to what each individual needs support in.

Tuesday, March 16, 2021

3-Act Math Virtually: redesigning the lesson for distance, hybrid or flipped learning

When we were first thrown into our emergency distance learning format 1 year ago, we kicked off our new online classes in survival mode. Students spent a lot of time those first weeks completing lessons on adaptive learning apps. But as we settled into our new model of school, I wanted to get back to a mathematics model based more on inquiry and hands-on learning. 

One of my favorite inquiry-based math models are the 3-Act Math tasks (originally developed by educator Dan Meyer), which are designed to inspire curiosity in students and an authentic desire to solve a mathematic problem. 

In our online (and soon-to-be hybrid) format, I've had to redesign the method of delivery some to allow for inquiry, collaboration and experimentation in math during both our synchronous and asynchronous times of day. 

3-Act Lesson Resources

Since Dan started the 3-Act model, several other educators have become regular developers of 3-Acts, and there are lessons available for all grade levels: 

Graham Fletcher's 3-Acts for K-5 (scroll to bottom of page for even more resource links)

Kyle Pearce 3-Acts for grades 3-12

Robert Kaplinsky 3-Acts for K-12

Presentation with slides & Google forms

Several years ago I started converting my favorite 3-Acts lessons into a slide deck format. The slides were a nice way to help me not only reveal one step at a time, but to also help me plan ahead and remember what questions I wanted to ask as we were working through the task. 

  
In our virtual setting, it's a helpful way to present online, and take notes that students can see clearly during our classroom conversations. The slides also make it easy to download individual pages that I may want to share to students during asynchronous works times via Google Classroom or another digital management tool.


I also recently tried using a Google Form to present and guide students through a 3-Act task. After discussing as a group, the form gave students an opportunity to also record their individual thoughts and work. And using multiple sections in a Google form is a great way to still manage the Act 2 and Act 3 reveals to occur after students have generated their own questions and thoughts about the "math mystery" presented.

With a significant amount of our day asynchronous, or in smaller synchronous groups right now, the format of using a Google Form also allows me to assign some 3-Acts as independent work or to small groups to work on in a breakout. While I prefer the collaboration of discussing a 3-Act task whole group, I've also found success (once students have practiced the task several times) in letting some small groups lead these tasks on their own (especially my students needing a math extension) or starting the task with a whole group notice/wonder and then letting students work independently on solving before reviewing our work again as a whole group.

Jamboard for collaborating & visualizing thinking

Google's Jamboard whiteboard app has been my new favorite tool in the last year for digital collaboration. It's been simple for my 2nd graders to learn and use, and gives us a lot of options for both group work and individual work. 

Jamboard has become my tool of choice for our virtual notice/wonder activities. It gives me the options of doing all of the recording on the page, or allowing students editing access to write thoughts on the board themselves. Jamboard also makes it easy to manage separate pages for my small groups as I repeat the 3-Act task with each group. I can create templates for each part of the task by uploading pre-made images, duplicate pages quickly for each group's notes, and even download individual pages to share with teams or students as needed.

Students love being able to draw on a Jamboard screen, collaborate with their team, or upload images of their work on paper.  Assigning a 3-Act Jamboard to students via Google Classroom (either a collaborative board or as a "copy for each student") has worked well for students' estimating and submitting their thinking about the task. 


Structuring the task within new time constraints

In our distance model (and soon in our hybrid model) we've spent more time working in small groups for shorter stints of time, instead of having long blocks of live time together like we did in class. For that reason, I've restructured the 3-Act tasks to happen over the course of 2 or 3 small group sessions. The tasks are already designed well with natural breaking points, so we typically cover Act 1 (the hook, the notice/wonder, the estimating) in our first session, and Act 2 (the release of more info + work time) in another session and Act 3 (the reveal and reviewing our work) in a third session. 
Sometimes, Act 2 can start in a live group and then continue independently. This has given students an opportunity to work at their own pace to continue thinking about and solving the problem, so that everyone has something to share when we return to our small groups for Act 3.
This model has also worked well in our typical, in-person classroom setting for assigning some 3-Acts as an extension activity to small groups of students.

Links to my "virtual" 3 Acts

3-Act Jamboard template (for recording work)

Saturday, February 6, 2021

Personalized Programming Pathways: developing student-led learning in CS & coding

I'm trying to rethink the way that I teach my students about coding. I've always been a fan of a project-based approach over any other, and this year I started thinking about how I might also make that experience more personalized to my students' interests and needs. 

Having spent nearly a year teaching 2nd grade online during this pandemic, personalizing the learning experience feels even more important now than ever before. I am constantly seeking out ways to motivate, inspire and engage a group of 7 and 8 year olds who are all having to do this school thing more on their own than ever before.

Design Challenge

Most recently, my latest experiment was to pose a programming design challenge to a group of my more advanced learners. In math, we've been spending a lot of time on strategies for adding and subtracting 2-digit numbers and I noticed that a majority of my students were still having trouble mastering their early facts (sums/subtraction within 20), which is then getting in the way of their work with larger numbers. 

So, the problem that I posed to my programming groups was: "design a math video game to help other 1st & 2nd grade students practice their math facts".

Process

Honestly, I'm figuring out this process as we go. I knew a group of my students needed something more challenging to work on, I knew they enjoyed the coding we'd done so far this year, and I wanted there to be a design element since we are a design-focused TK-8 school. Most of the decisions I've made about the process have happened on the fly (i.e. the night before the next assignment or the day of). Here's what we've come up with so far:

  • Sketch out or storyboard a plan for your game with pencil & paper
    • Label what the user will see on the screen
    • Label what the user will have to do or accomplish
    • Label any buttons or interactive elements you think you might want to have
  • Conference with teacher about your plan
    • Think about what coding and design skills you already have
    • Create a list of skills you need to learn in order to move forward with your game
  • Complete coding mini-lessons
    • Skills assigned to individual students based on their requests
  • Use what's learned in mini-lessons to build out video game prototype in Scratch

Personalized Coding Pathways


I conferenced with each student individually to review their plans and determine what skills they already knew and what coding & design skills they would need to learn in order to realize their project. I was impressed to see that they were able to identify quite a few skills that would better help them to create what they wanted. They didn't necessarily use all of  the coding terminology in their descriptions, but I went ahead and added the vocabulary terms as we went along.

After meeting with each student, I looked for patterns in their requests and I've started developing mini-lessons and challenges to help them learn and practice new skills. 

My lesson design plans:
  • Keep it short to ensure that students are able to maintain attention and so as not to overwhelm their cognitive load for new material. 
  • Package each mini-lesson into a "hyperdoc" format with UDL design principles in mind-- text option, video option, lots of visuals-- so they all have different ways of accessing the new content. 
  • At the end of each mini-lesson, students complete a mini-make to demonstrate understanding (by following along with a video example & customizing as they like). 

So far students have completed mini-lessons (in Scratch) on:
  • Using the ask/answer blocks 
  • Using selection/conditional statements (if/then/else blocks)
  • Creating & using a score keeping variable 
  • Creating & using lists
  • Creating a game timer (coming soon with the help of another wonderful educator in Canada, Andrew McDonald)
  • Creating a side-scrolling effect in game (coming soon)

So far, so good. Students have maintained engagement and are starting to incorporate their new programming skills into the actual games that they want to build. 

Additional Personalization Plans


1) Build out collection of mini-lessons

As students start building out their final game prototypes, we'll continue to revisit their individual learning needs and I can create additional mini-lessons based on those evolving needs. Ideally, I can accumulate a collection of mini-lessons that can be used with future classes and hopefully in the CS class I'm designing and opening at our school site next year.

2) Badging

In the future, I'd also like to add a gamified element to the learning process to help students celebrate their learning, track their growth, and identify peer "experts" that they can learn with and from. 

This year I successfully launched a digital skills badging system with my 2nd graders, and in years past I used a similar badging system in a cross-grade level digital making/programming explore class for 2nd-4th graders. I'd like to combine and expand on the badging system to use in my CS classes in the future.


3) Peer & Self-assessment process

I'd also like to embed more self- assessment and possibly peer assessment in the process. In our online format this year I've lost momentum with the self-assessment process that had become such a regular routine in the classroom. I am still using learning targets to help students clearly identify the specific goal they are working toward, but trying to get back to a self-assessment process to support more reflection on their learning and next steps.

CS learning targets example