Search This Blog

Tuesday, December 1, 2020

Scratch Voting Apps-- a design-based CS project revamped for distance learning

For the last four years around October/November I've enjoyed launching my government & voting unit
with my elementary students followed by a computer science-based design challenge in which we introduced students to some basic coding concepts by creating a digital voting booth. 

Usually I get to use the project to introduce students to physical computing (where they learn some circuitry by creating working buttons with a Raspberry Pi and program the buttons in Scratch). This year, since we are still teaching 100% online, I made a few adjustments for our online format, and wrapped the unit within a design thinking method.

How Might We Make it Easier for More People to Vote?

With this being a presidential election year, my students were hearing a lot about voting this year. And one of the major topics in the news was about helping more people to vote during a pandemic (and to increase participation generally). This current event inspired our guiding question, 'how might we make it easier for more people to vote?'

Our first steps as designers were to learn more about voting, and then to ideate around how we could create systems or items that would make it easier for people to vote. Students suggested everything from door-to-door ballot collectors to apps, buttons installed in our homes to mobile polling places, text messaging services to ballot delivery drones. 

Planning our Voting App

Before we launched into app development, I then tasked the 2nd graders with ideating around what
features they thought our app should have in order to be accessible by many different types of people. I prompted them to think about what helps them learn and understand best. I was impressed by their thoughtful ideas around accessibility elements (sound, images, clear instructions), security and ease of use.

Coding Lessons

For the last several years I've taken a project-based approach to teaching programming to my students. Students begin to learn by copying, and then play with and customize those basic programs to learn more. I have also learned that my students prefer more pictures and lesson text in their coding lessons. 

For this project, I took my previous lesson deck, took out the physical computing, updated it for Scratch 3, and simplified it even more (one to-do per page; a few images and even less text). 

**slides embedded at the end of this post**

Facilitating the Coding Lessons

Previously all of my 2nd graders completing a name animation as their introduction into Scratch, so students had limited knowledge of coding with Scratch, but did have some. The coding work was done during a combination of synchronous and asynchronous sessions. The only explicit direction was when I
taught students how to use the lesson deck and then students followed directions in the slide deck at their own pace to learn how to create and program digital buttons. 

I also chunked out the lesson slides into smaller sections. Part 1 was copied into a smaller deck and assigned separately from parts 2 and 3, so that students could achieve small successes along the way to their final prototype.

As students got stuck or needed help, they were able to get support from peers, 2 parent helpers that volunteered to work online with students twice a week, or from myself. I am lucky to have a Go Guardian district account that allows me to view all of my student's work screens while they are online, so I could talk students through finding what they needed while viewing their screens or sending a quick text message in the Go Guardian platform. When working with our parent helpers or in breakout rooms with their classmates, students could take turns sharing their screens to get the help that they needed.

Presenting our Prototypes & Soliciting Feedback

New this year, I invited several guests (2 board members, a classroom parent and our school principal) to test the students' voting app prototypes and provide some feedback for improvement. It was incredibly motivating for students to know they would have a real audience for their work, and a good opportunity for students to learn how to accept and use feedback, and to reiterate. After the presentation, all students were required to make useful updates to their projects and then publish their second or third iterations to their Seesaw portfolios.

What We Learned

The design thinking approach to this project was a positive update that encouraged more thoughtful work, grounded in empathy, and having an authentic audience for their prototype showcase was a great motivator for students to learn deeply and practice their programming skills carefully. They wanted to showcase work they were proud of, and that kept them engaged in the project for hours at a time.

Next year I look forward to bringing back the physical computing aspect of this project, as well as improving in our empathy work, by finding community members that we can talk to about voting habits so that we have real data with which to guide or design work.


Monday, November 23, 2020

Using a badging system to "level up" students's digital skills

Every year my 2nd graders learn quite a lot of digital skills over the course of the year. This year, in distance learning, I needed my students to pick up a lot more digital skills a lot faster than they would need to in a normal school year. So I set up a gamified system to explicitly teach students the skills that they would need to be able to navigate their Chromebooks and online classroom more independently, and hopefully to motivate them to complete those lessons.

I started by brainstorming a list of all of the skills and tools that I thought they might need, and then I broke those skills down into sets of even smaller skills. I wanted the lessons to be no more than 2-5 minutes each, with clear outcomes, so that students could celebrate little successes along the way and maintain motivation to keep going. 

For example, learning how to use Google Classroom has turned into a whole series of mini-lessons including:

  • How to use "classwork" view"
  • How to open an attachment on an assignment
  • How to use the "mark as done" button
  • How to unsubmit
...and the list goes on. 

I pushed out the lessons in order of need (and added lessons to the list as new or unforeseen needs arose). The first lessons were about logging into our Chromebooks, how to take a screenshot (they'd need that a lot to submit their evidence of mastery), how to bookmark a website and how to use Clever (our single sign on app). 


I create each lesson in a Google Form. It's been the most straightforward way for me to package the lessons and the simplest way for me organize submissions as they come in. Most forms include either a video mini-lesson or a step-by-step graphic, followed by a specific task the students need to complete to demonstrate mastery of the skill and earn their badge. At the bottom of each form is a space for students to upload their evidence (using this tool on a Google Form was also one of the early mini-lessons), usually a screenshot, but as time has gone on, sometimes students create audio files or video files to show their learning.

--> Click links to view example 1 & example 2 of the mini-lessons

As students demonstrate mastery of each skill, they earn a digital badge celebrating their accomplishment. I create simple badges in Google Drawings and download them as .png files to paste into a spreadsheet where the students can view their badges. I'm sure there are ways that this can be automated, but since I manually have to check the evidence that they submit anyway, this works just fine for me, and isn't any more work than assessing any other assignment.

--> Click to view badges

While I would like all of my students to participate in the skills badging, they do not. But, those who do participate are having fun "leveling up" when they get a chance, and others can use the spreadsheet to see which students are "experts" in which skills, and then tap those students for peer support when needed. And with all the lessons archived in our Google Classroom, any student that wants it has the opportunity to go in and complete older lessons to earn those badges.

--> Click link to view example of spreadsheet with badges

Overall, the majority of students enjoy the lessons and have fun trying to collect as many badges as they can. I've noticed that my students did learn how to use their Chromebooks more proficiently and quickly this year than years past, and I plan to continue this practice even as we return to the classroom.

-----------------------------------------------
**This system was inspired by a badging system I used last year to differentiate and individualize computer science instruction for my elementary students. Those resources will come in a future post.

Saturday, October 24, 2020

Strategies for Supporting Self-Direction in K-2 Students in Distance Learning--> UPDATED

Distance learning has definitely put my Masters in Digital Learning Design to the test in the last year! Our schools closed last March, and a couple of months later I wrote a post about how my 2nd grade team was designing for online learning that allowed our young scholars to be self-directed at home. 

Now, since we will likely be in some type of distance learning format through the end of the school year (whether fully online or some type of hybrid or blended model), I wanted to share some up-to-date tips for supporting more student self-direction at the K-2 level, based on my (and some of my colleagues's) experiences this year having to train students in a fully online format in self-directed routines.

Provide explicit technology training for students 

Do not assume that students in the digital age will be able to figure it out on their own (or that parents will). Explicit technology training & tutorial videos help our students learn use devices and apps more quickly. Plan on reteaching every time you introduce a new tool. I know it can be hard to "give up" live class time for tech training, but putting in the work up front to help students learn the tool means that the technology is less likely to get in the way of their learning once you start using the tool with curriculum.

What tech tutorials might you provide to students? 

Consider not just app tutorials, but what general tech skills students (and families) might struggle with at home, or what new challenges might arise when sharing a computer at home. Click to view an example of a tech mini-lesson we recorded for our 2nd graders.

Some of the topics that we developed training on included:
  • How to create & navigate multiple Google profiles on a shared computer
  • How to use multiple tabs in your internet browser
  • How to use ZOOM (both on a Chromebook or on a tablet)
  • How to view & turn in work on Google Classroom
  • How to find & turn in activities on Seesaw
  • How to use our online reading curriculum
  • How to use our online math curriculum
  • How to copy & paste links/web addresses
Tip--> try to record screencasts using the student view of an app. Open an incognito browser in Chrome, log into one of your students' accounts (with permission from the student, of course), and screencast the app exactly as a student would see it rather than from the teacher app.

Technology "badging" system

We also started a technology badging system for students. Students earn digital badges for learning and demonstrating technology skills. They get excited about collecting badges and they are learning a lot of skills in the process. I started creating the badges in Google Drawings, and I paste them into a Google Sheet as students earn them. Click to view an example of a badging lesson.

Google Classroom in K-2

After lots of trying, failing, and changing the way we do things, the following ideas have helped make Google Classroom much more accessible for our primary-aged students and emerging readers.

Create "Topics" in Google Classroom

Topics allow students to filter to assignments for a particular week. Train students to find learning activities on the "Classwork" screen, where topics are listed like a table of contents on the left side of the screen. 

We create two topics for each week and name them "Week #.... self-directed (dates)" and "Week #... class time with Ms...." Asynchronous lessons get tagged with the "self-directed" topic and resources that we might use during our synchronous class time get tagged with the "class time" topic. 

Creating Assignments for young learners

      • One post per assignment: In the spring we tried a few different formats, but now that we're back to a more regular school day schedule, the work load has increased. We discovered that posting every lesson as a separate assignment allowed students to check off each lesson as they go and use Google Classroom as a "to-do" list of sorts.
      • Use emojis 👍🏻: Give students visual clues with emojis. I use emojis often in the assignment names and in the instructions to support emerging readers with understanding instructions. Now, when they see a green book emoji on a post, they know right away that they're doing something in their green phonics books. When they see a pencil, they know there will be some writing.
      • Video directions on each post ⏯: I try to record myself reading directions aloud on each assignment post. Videos are always titled "listen to directions..." and assignment name on the back. The "listen to directions...." video are separate from the lesson videos. These are strictly a screencast of me reading directions on a post. If students are confused by directions, or struggling to read, they can read along with me when they watch the video.
      • Live class meeting links 🔗: This year we organized all of the weekly meeting links into Clever, since our district has an account. That way all regularly used links are in one place-- Zoom links, Google Classroom, Seesaw, Epic, and other creation apps. I created one class meeting link that reoccurs every week, so the link never changes. As did our reading interventionist, our art teacher and the other homeroom teachers. If your district doesn't use Clever, organize Zoom or Hangout links together under one topic in Classroom. Students could use the same links each week for meetings that they need to attend, including links to class meetings, art class, office hours, school clubs, etc. 
      • Try Mote 🎤: Mote is an extension for Google Classroom that lets you record audio feedback for students in a document or in Google Classroom itself. It has been a game changer! My students love being able to listen to feedback or notes that I leave in comments to them. Mote is also another great way for me to leave a read aloud of instructions on the bottom of a post.

    Designing digital lessons in K-2

    • Keep it short ⏱: In a classroom we think a lot about how much time young learners are being asked to sit and listen. The old rule of thumb -- 1 minute for each year of a person's age-- is still true in a virtual setting. Keep it short! If you are teaching 5 year olds, keep the video lessons shorter than that. For our 2nd graders, video lessons are about 6 minutes or less. Any longer (just like in a classroom) and they start to get wiggly and distracted. If they are no longer focused, my lesson is no longer effective. 
    • counting collections from home
      Make it hands-on 🧮: I am a believer in constuctivist and constructionist theories that we usually learn best by experimenting and doing. Just because students may not have access to the manipulatives in our school buildings, doesn't mean we can't find ways to incorporate hands-on experiences. My team sent home a box of materials we call "Innovation Kits" with the student's workbooks. The boxes include dice, play doh, recycled materials, colored tiles for counting, a small succulent, a hand full of Lego bricks, and more. Things that cost us little or no money and we weren't afraid to have get lost. We've also had students find things that they already have at home that they can use for math and sciences. This week's counting collections were made up of macaroni, beans, legos, Q-tips, toy trains, rice, and more! 
    • Virtual Manipulatives 🎲: There are also a lot of great virtual manipulatives available online for free that students can use to make sense of math and science concepts. Click this link to check out my post on virtual manipulatives for math. For science, we've had students become observers of natural phenomena around them-- plants, the moon-- to allow them to engage in science off the page. Mystery Science is also a great resource for low to no-prep hands-on investigations or printables that you can send home or drop into a Seesaw activity... and they are still offering a free distance learning version of many of their materials. 
    • Make it predictable 🤔: Incorporating predictable learning formats lessens the cognitive load for students, allowing them to focus more on the content and less on learning how to use the technology or complete an activity properly. Our phonics routine is a popular one with our 2nd graders-- they love knowing that every lessons starts with a mini-lesson video by my colleague, Mrs. Hughes, and then typically follows with a workbook page or word work game. Inspired by Jon Corippo & Marlena Hebern's EduProtocols, we've also created a new set of reuseable templates for learning routines in math and reading, including some #MathReps activities, counting collections, frayer models for vocabulary and story maps (click to see our shared templates on Seesaw). The best part is, we will continue to use these routines when we go back to school, to allow students's more independence in the classroom while I can focus more time to focus on small group teaching).
    • Don't forget opportunities for creating 🎨: While we do like some predictability, we still make sure to make learning fun. As a school centered around design thinking, it's a priority for our students to engage weekly in elements of design, creativity and innovation. Our 2nd graders start every day, as we are all getting logged into our morning meeting, with a "Do Now" creativity sprint. These short warm-ups range from drawing challenges to scavenger hunts to creative math challenges. Our young learners also have opportunities to create digitally with free tools like Scratch or Scratch Jr., Google Drawings, Seesaw drawings, Adobe Spark and more. They engage in low to no-prep art and music lessons (we are lucky to have arts teachers recording lessons, but we've also pulled lessons from YouTube recorded by teacher from all across the country). They make and build their ideas using recycled materials at home.
    • Design with UDL in mind 💭: If you aren't familiar with Universal Design for Learning (UDL), it is a framework for the design of instructional goals, assessments, lessons and materials that is broken into 3 major guidelines -- engagement, representation and action/expression. What I most appreciate about the model is that it reminds us to design every lesson with all learners in mind. Using UDL guidelines for design ensures that we have scaffolds built into every lesson (no need to create 3 or 4 different versions of a lesson to meet different needs) and help develop agency in our young learners.
      • Multiple means of representation 📖🎧📺: Design lessons so students have access to text, visuals, videos and hands-on opportunities in the lesson. It sounds like a lot, but once you get into a design routine it comes together pretty quickly. An example-- our independent reading lessons are posted with a story to read, an audio file to listen to while they read along, visuals to help front load vocabulary in a story, and we use TPR (total physical response) to explicitly teach tricky vocabulary or phonics patterns during live lessons. 
      • Multiple means of engagement ✏️📹💬: We incorporate student choice into most of what we do. Literacy choice boards let them decide whether to read, practice word work skills, or write during part of their literacy time. They have similar choice with weekly math choice boards. Students often also have choice of how they demonstrate learning-- type or hand write, draw or create a digital image, write or speak responses, and in some larger projects students can choose topics of study and/or how they present their learning (video, animation, speech, writing, etc.). Tools like Seesaw, Flipgrid, and Google Tools allow our students lots of choice in sharing what they know.
      • Goal setting 🎯: Students engage in simple weekly goal setting and reflections. We train them explicitly in how to do this for the first several weeks, and they it become an independent task in which students think about what they need more practice in and/or want to learn this week. They document that goal at the start of the week and reminded throughout the week to keep it in mind while working on learning tasks. This helps them determine where to place the more of their effort, or how to make strategic choices for their learning. Fridays are reflection days and students are asked to think about what new skills they learned during the week, and what they still want to work on the next week.
      • Executive functioning skills 🗓: Students (and many adults) of all ages benefit from explicit teaching of executive functioning skills (i.e. how to self-manage and monitor progress). We start every year with explicit stamina training, timing students during work time to show them how long they work without getting distracted (they love seeing the graph increase over time). This year, we've had to take additional steps to help students develop skills for managing their time at home on their own. We've taught students how to:
        • Use timers throughout the day to time their breaks and work sessions (some buy timers, but there are also plenty of free apps and YouTube timers). 
        • We've explicitly taught them how to use the calendar and to-do list features in Google Classroom. 
        • We've taught them how to create their own to-do lists on paper (or sometimes provide them with a template). 
        • We've taught them how to break a task into smaller parts. 
        • We've taught them strategies for goal-setting and making strategic learning choices. 
        • I also like to have students teach each other. Just this week, as I noticed students work stamina waning, students shared with each other their strategies for staying focused at home (ideas included hiding toys, using a timer, finding a quiet corner, do everything before a certain time, ask Ms. Haughs for help, etc.)

    Saturday, September 5, 2020

    Digital Math Manipulatives for 'hands-on' math in K-3 virtual learning

    Now that many teachers have had to take their lessons online, finding ways to engage students in hands-on manipulation of mathematics concepts is more important than ever. It can be easy to find ourselves wanting to simply plug students into adaptive math video games in this format, but as the CRA model shows (a research-based learning model that uses a concrete - representational - abstract process of introducing students to mathematical concepts), math is more meaningful and concepts more "sticky" when students engage in hands-on and visual explorations and discovery before being taught an algorithm or rule.

    Without access to all of the wonderful manipulatives and tools that we have in our classroom, I've had to get creative about how students can engage in more hands-on, visual and inquiry-based math experiences in my distance classroom. 

    Below are some of my favorite online manipulatives for digital math inquiry.

    Math Learning Center's free math apps 

    The Math Learning Center math manipulative apps work on a variety of platforms, and even allow teachers to set up and share out specific tasks to students using a share code. Drop the link to your created task in Seesaw or Google Classroom, and students have quick access to an exploration using virtual tools including number racks, geoboards, number frames, and more!


    Toy Theater's virtual manipulatives 

    Spinners, dice, place value mats, marble jar, and the list goes on. You can share a link to a specific tool in your platform of choice and students can manipulate visuals and numbers in the Toy Theater's uncomplicated, ad-free, web-based (works on any device) app. Teach your students how to take a screenshot and they can share their work back to you via Seesaw, Google Classroom or an LMS.

    If you're an elementary teacher, you should definitely check out Seesaw. Originally designed as a digital portfolio where students could showcase their work for parents and peers, Seesaw is now also a space for students to demonstrate learning in a variety of ways, and educators to design interactive lessons that allow students to engage with the learning in multiple formats. Seesaw's whiteboard tool includes several built-in math manipulatives within the "shapes" menu including place value blocks and 2-dimensional shapes. You can also upload clip-art using the "image" tool, making the Seesaw whiteboard a great space for designing hands-on learning experiences in math.


    Hundreds Grid by Classworks
     

    This is a fun, stand alone app for exploring number patterns with students. The reason I like this digital hundreds chart over others is that you can use the slider to view numbers anywhere between 0-1000. I like to display this whole group for number talks, using various colors to highlight patterns and practice different count-bys (counting by 10s, 5s, 3s, etc.).

    Clipart + Google Drawings or Jamboard

    If you're feeling crafty, you can also create your own interactive experiences using some downloaded clipart and Google apps. My favorites right now happen to be Google Drawings and Jamboard, or a mashup of both. Recently I've started using the "Math Reps" Eduprotocol (using a basic template to provide students with the repetition needed to develop skill fluency) plus some free clipart downloads off Teachers Pay Teachers to design a set of math reps templates aligned with our current math curriculum. We push out our math reps as a weekly Seesaw activity and include tasks such as manipulating a number rack, jumping by 10s, using number sticks and place value flats. 
      • Click here for a sample template created in Google Drawings. 
      • Click here for my Math Rep Seesaw activities for my 2nd graders.
      • Click here for some Math Reps templates in Google Jamboard
      • Click here to learn more about Eduprotocols


    Geogebra

    Duane Habecker has also created some really nice virtual manipulatives in the Geogebra app including place value disks, color tiles, reknreks and ten frames. I really like the pattern blocks app that locks the blocks into place, making working with the blocks a lot easier than it's been in other apps where they slide around and don't fit up against each other quite right. These pattern blocks and sized just right and fit into a grid that allows for more accurate exploration of composing/decomposing shapes, fractions of a part, and completing pattern block puzzles or artwork.

    DIY Manipulatives at home

    You can also get creative about helping students to make their own hands-on learning experiences at home. Everything from beans, to egg cartons, to buttons, to string, to building blocks, to measuring cups can be a math manipulative for children to use while learning from home. Have students prep for the next day's math lesson by giving them a suggested list of materials around the house that can be used to practice counting, sorting, graphing, adding, subtracting, multiplying and more. Students can manipulate the materials right along with you during a lesson and take a picture or video of their work in Seesaw, Google Classroom, Flipgrid, etc. to help them share their work and explain their thinking.

    Thursday, July 2, 2020

    Distance learning in K-2: student agency & self-direction while learning from home

    I've written and presented in the last couple of years on how we can support our primary students with being more self-directed & independent learners at school, and the last few months of school definitely put all of that work to the test. 

    Our schools closed mid-March and after a short break, students were asked to continue work at home via distance learning through the end of our school year (mid-June). While some of our classroom structures and practices did prepare our 2nd graders for working from home, there were also a lot of changes that we had to make from week to work to better support the new learning situations that everyone was in. 

    After weeks of reiterating on our lesson design, and numerous meetings and conversations with parents and students, and surveys of both groups, below are some of the lesson design elements and structures that were most successful in supporting more self-directed learning for our young scholars. 

    Note --> The student population at our school is incredibly diverse-- linguistically, economically and in terms of number of students with special needs. With that, our school & district ensured that all students had a Chromebook and internet access at home, which students will get to keep through summer. Our school library also continued to offer a modified book check out system, and our school office organized a packet pick up system weekly for those who needed or preferred paper-based assignments. We also were able to continue offering counseling services remotely to those students who were receiving them before school closed. I mention this because I know that not all schools and students had the same access to devices or resources at this time, and the privileges we enjoyed in our district also directly impact the work that students were able to continue at home.

    Provide tech training & tutorials

    Our 2nd graders had been using Chromebooks, Google Classroom and Seesaw all year long up to this point, so we assumed that the transition to using these tools at home would be seamless... we were wrong. Plus, we were going to need to use a couple of new tools for distance learning (i.e. video conferencing, etc.) and not all parents were familiar enough with these tools to help their children get up and running at home. 

    So we started recording tech tutorial videos and including tech training into our live class time. We posted the videos on a class website that we'd already been using all year (and revamped for distance learning communications), and shared them to students in both their Google Classroom and Seesaw. 

    We also taught them how to view the tutorial videos during our live class time, covering topics including:
    • where to find the videos 
    • how to rewind, pause and fast forward 
    • how to skip ahead & rewatch a section that best answered their questions
    What tech tutorials might you provide to students? 
    Consider not just app tutorials, but what general tech skills students might struggle with at home, or what new challenges might arise when sharing a computer at home. Some of the topics that we developed training on included:
    • How to create & navigate multiple Google profiles on a shared computer
    • How to use multiple tabs in your internet browser
    • How to use ZOOM (both on a Chromebook or on a tablet)
    • How to view & turn in work on Google Classroom
    • How to find & turn in activities on Seesaw
    • How to use our online reading curriculum
    • How to use our online math curriculum
    • How to copy & paste links/web addresses
    Tip--> try to record screencasts using the student view of an app. Open an incognito browser in Chrome, log into one of your students' accounts (with permission from the student, of course), and screencast the app exactly as a student would see it rather than from the teacher app.

    Parent office hours

    While this is a post about helping young students be more self-directed, I am also realistic about the fact that we are working with 5-8 year olds who are not going to be completely independent all the time. They are going to need to ask questions, and in this format without their peers and teachers nearby, the people that are most available to them all day long are their parents or caregivers. 

    When distance learning first launched, and the emails began streaming in, many of our teachers began setting up regular parent office hours. My team chose to stagger these office hours so that families who couldn't attend an evening session, could choose a morning session, and vice versa. Office hours became a work help, tech help and Q&A session for family members supporting students, and allowed parents a time to connect with, commiserate with, and support each other.

    Work Flow -- keep it simple

    After lots of reiterating and lots of feedback from students and parents, we knew that we needed to keep the workflow as streamlined as possible. (And I'm sure this will continue to update in the new school year!) What we came up with was a 2-part system for pushing out weekly assignments.
    • Week-at-a-glance Overview document for families
      • This document was mainly for parent and caretakers to use. While we regularly emphasized that it was okay for families to create their own weekly work schedules based on their specific needs/situations during this odd time, many did request that we send home a suggested plan that somewhat mimicked what our school day might look like.
      • The document was organized by overarching subject area and then noted what assignment was to be worked on each day of the week (see example attached).
    • Google Classroom for students
      • Use topics: After a lot of revising to this system, we finally settled on an organization structure that my teacher fiancé, Scott Denman, had put into place with his 5th graders after a suggestion from a colleague-- we created topics for each week of distance learning, with the dates in the topic name.
      • One post per subject each week: We created one post for each subject area, outlined the whole week's worth of directions in that post and tagged the post with that week's topic. 
        • The type of work that students engaged in might be in other apps (Flipgrid, Seesaw, Formative and Quizizz being some of our favorites for our 2nd graders!), but this was always their starting point.
    organizing Google Classroom

      • Video overview on each post: Also at the suggestion of my fiance, we began recording screencasts of ourselves reading the directions on each Google Classroom post and attaching the video to the post to support our non-readers or anyone overwhelmed by all of the text in the Google Classroom post.
      • Live class meeting links: We organized all of the weekly meeting links together as one topic in Classroom. Students could use the same links each week for meetings that they needed to attend, including links to class meetings, art class, office hours, school clubs, etc.

    Provide visual & auditory supports into instructions/lessons

    • Emojis: Text-heavy assignments can be overwhelming for adult learners, let alone young
      using emojis in lessons
      learners who likely have not yet mastered the art of reading. Emojis were one way we could break up the text in a set of instructions and give students clues as to what the upcoming sentence might be about. We used emojis as visual cues mainly in Google Classroom, Seesaw and Flipgrid directions. This was especially useful in Google Classroom, which doesn't allow teachers to embed any visuals or videos into posts.
    • "Multiple means of representation & expression"-- universal design of lessons: Without the just in time support of their teachers and peers at home, considering UDL guidelines is more important than ever in developing flipped and synchronous learning experiences for our students. If you haven't heard of UDL before, or need a refresher, I've linked resources for learning more at the end of this post.
      • Video lessons: All of the lessons that we pushed out to students were presented in a video
        video lesson embedded in doc
        format. Phonics and ELD lessons were screencast, math lessons were recorded in Seesaw and science lessons were sourced from video curriculum providers like Mystery Science. Students could read along in their workbooks or rely solely on the video lesson, but in all cases they had both text and video lessons to support learning.
        • Screencasting tips:  
          • Keep it short. 5 minutes is my magic number. Cognitive load theory in learning design explains that our working memories are limited and if we overload working memory when teaching a new concept, learning can actually be hindered. The younger the student, the smaller the chunk of information that they can process in one sitting. 
          • Try to include your face in screencasted lessons. Students love seeing their teachers faces AND it allows students to process facial expressions and mouth movements that may help them to better process or understand the information that they are learning in the video.
            listen to directions attached to post
      • Video & audio read-alouds of instructions: Instructions for weekly assignments, practice pages and quizzes were recorded on video or audio files. For example, Quizizz was a favorite tool for quickchecks as we could record ourselves reading each quiz question and answer choices. In Google Classroom, we recorded screencasts of ourselves going over the typed directions on a post so students could both read or listen to the text presented.
      • Diagrams and charts: Some students learn best from visual diagrams or reminders that can be printed out and referenced. Annotated screenshots or visual/icon-based how-to resources (made in programs like Piktochart or Canva) can be useful for students who are learning how to use a website or need to repeatedly reference step-by-step directions for a task or procedure.
      • Student choice: When submitting their work, we gave our 2nd graders plenty of choice about how they could demonstrate learning. Choices ranged from workbook pages or other paper (turned in by taking a picture and attaching to Google Classroom or Seesaw posts) to video to digital drawings to typed responses to photo collages. Whatever worked best for the students or made the most sense for an assignment was accepted as a work sample.

    Executive functioning supports for the win!

    During the live school year, several of the 1st and 2nd grade teachers had done work in training our young scholars to make more choices for their own learning using structures such as the Bridges Math work places and The Daily CAFE literacy model. 
    Part of helping students make choices for their learning also includes giving students resources for understanding what skills they have mastered and what skills they need more practice in. 
    • Checklists: In class, our 2nd graders practiced using a template to create monthly checklists of "must do work", including documenting due dates to help them prioritize their work choices during the school day. We realized several weeks into distance learning that this structure might be even more important at home. Each Monday, when we pushed out the week at a glance document to families, we included a checklist document for students to help them develop working goals for themselves throughout the week and keep track of what they needed to complete by Friday.
    • Goal setting & reflection: Another routine we'd practiced weekly in class, we asked students to continue this practice at home. During the live school year, we assigned a Seesaw goal setting activity every Monday in which students set a learning goal for themselves. Each Friday they would receive another Seesaw activity that asked them to reflect on their Monday goal and whether they felt as if they met that goal. During distance learning, we continued pushing out the Friday reflection, asking students to reflect on work or learning they were proud of that week and to post an artifact that supported their reflection.
    Learning targets in assignments
    • Learning targets: In order to help students hone in on what it was they truly needed to be able to do independently after each lesson, we continued to use learning targets in our distance learning model. Learning targets explained specifically what skill students should be able to demonstrate after a lesson, and were included in lesson videos, on practice slides, in Seesaw activities and in Google Classroom posts. Teachers reviewed the targets in video lessons and instructions.
    • Data analysis for self-reflection: In order to set learning goals for themselves, students needed to know what they still needed to know. During live class time we had data talks with our 2nd graders, reviewing phonics, reading & math assessment data with them regularly so that they knew what skills they had mastered and what they needed to work on next. While distance learning students used data from Quizizz quizzes, feedback/comments from teachers on Seesaw posts and the reflection prompt, "what can you do mostly by yourself, and what do you mostly need help on from family members?" to help them reflect on what learning goals they should be setting for themselves.

    Thursday, June 18, 2020

    Virtually Code Club: hosting an elementary Code Club online in the midst of distance learning

    When we asked our students about the things they really missed the most about school during our shelter in place, the answer was nearly unanimous-- it was their friends and their social life that was the biggest loss for them.

    So in April I decided to launch our school's first Code Club. It would, of course, have to be online, as we'd be sheltering in place for the remainder of the school year, but the goal was to provide students with a place to "hangout" with friends and potentially make new ones. I started by tapping a few colleagues with an adventurous spirit and interest in coding in schools to facilitate the club with me (thanks to the amazing Alicia Hamilton, Kimiyo Cordero & Sandy Richards!), and then we worked on redesigning the club experience to fit in an online space.

    Getting Started 

    We decided this club would be for students in grades 2-5 (mainly they needed to be able to read mostly independently) and we advertised that students would need to be comfortable working in a self-directed format (i.e. they should not expect us to be teaching coding lessons).

    We didn't put a limit on the number of students that could sign up-- the online format meant that space wouldn't be an issue, and, including myself, we had 4 teachers lined up to facilitate the group. We've discovered through distance learning that having more adults on a video conference is a great way to make sure that more students are "seen" during lessons and allows us more opportunities to provide smaller group and 1-on-1 support when needed.

    As for timing, we held our live club time once a week for 1 hour. Throughout the week, as students worked independently on projects, they were also welcome to share those projects and "chat" with each other via our Scratch Studio and Google Classroom.

    Our Virtual Club Setting & Materials

    Our district was lucky in that we had the resources at the start of this emergency distance learning to provide a Chromebook check out to any families that needed them. So all students in our school had access to the club if they were interested, and were either working from a Chromebook or whatever device they owned at home (some on Macs, some on personal laptops, and a couple on iPads).

    screenshot of our Google Classroom for Code Club
    Before our first session, we enrolled all the students that signed up in a Google Classroom for our Club.  It was a space that all of the students were already familiar with since we already used Google Classroom in our school. The Google Classroom held several roles-- 
    1) it was where we shared links to lesson resources and tutorials; 
    2) teachers could leave messages for students in the space since we did not yet have email set up for students in our district; and 
    3) it could be used as a place for students to share links to their projects and communicate with each other during non-club hours.

    We hosted our live sessions in Zoom. It was the tool that most teachers were using for their class meetings, so by the time we started our club, all of our students were familiar with how to use Zoom. We also liked that Zoom allowed us the ability to open breakout rooms, as our club ended up hosting about 60 students on some days. We ended up using the breakout rooms to offer small group sessions-- either for students working on similar projects to work together, or for others who didn't feel as confident with coding, to engage in a guided lesson led by student volunteers.

    We used the Raspberry Pi Code Club projects page and Digital Making at Home by Raspberry Pi as  lesson resources. The Code Club projects page offered a little something for everyone and students loved having the option of learning Scratch or Python or HTML/CSS. For students that preferred learning via video lesson, the "Digital Making at Home" was a favorite.

    Day 1: Launching the club

    We started off by making sure that everyone had an account in Scratch, either a school account (meaning we helped them track down their passwords if they had already used Scratch in their classrooms that year) or we helped them set up a personal account with parents. Before launching our first session we used a Google Classroom poll to find out whether they would need to set up a Scratch account and then communicated with those individuals outside of club time.

    Our first day of Code Club we introduced our goals for the club (talk to friends online, make things together, and share our work) and went over our digital citizenship expectations, both for communicating in our video calls and for engaging with others in Scratch. Students were expected to be kind online, give credit when remixing and report bad behavior if needed.

    We also decided on day 1 to walk all students through "get to know you" coding project-- the "animate your name" lesson in Scratch-- so that everyone had a chance to introduce themselves in a creative way, and we could make sure that all of the students had a baseline understanding of how to log into Scratch, follow project instructions on screen, and share to a Scratch Studio.

    Learning, Making & Sharing
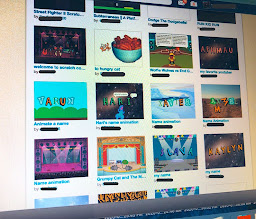
    screenshot of Scratch Studio used for Code Club
    Our Code Club Scratch Studio
    Moving forward, students were welcome to create projects in any language that they wanted to learn or practice, either using the Raspberry Pi Code Club projects page or project ideas of their own. Many stuck to creating in Scratch, but some used the lesson resources to start learning more about programming using Python 3 or HTML. No matter their age, the Code Club resources gave them enough choices to satisfy their various experience & interest levels. We were so impressed to see the complex platformer games being remixed and developed by some of our 4th graders, art projects and stories being programmed in Scratch by 3rd graders, "Minecraft-style" games being created by a 2nd grader with Python 3, graphics being created by a 3rd grader using HTML/CSS, and stories and animations of all types in Scratch being created by students of all ages!

    While we originally decided that we wouldn't be hosting coding lessons during club time, we did find that there was a handful of students that showed up because they wanted to learn more coding, but didn't know where to start or had a tough time following all of the lesson directions on their own, so we did end up offering a small breakout group for those that wanted an explicit lesson. The first time we tried this, I thought I'd be leading the lesson until one of our students offered to lead the lesson for us. We happily let her take over and it worked out so well that each week we asked the students which of them would like to teach the breakout group.


    Since the focus of our club was to provide some social time for students, mics and chat were allowed on and students could speak to each other and teachers at any time (no hand raising necessary). It was wonderful during club time to listen to a group of 2nd, 3rd, 4th and 5th graders complimenting each other's projects, asking questions and helping each other. Really, for the most part, the students were able to run the show and adults were just there to manage timing and the video conferencing-- and we loved watching them take ownership of the club!
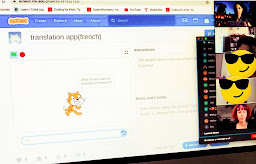
    screenshot of student sharing a coding project via Zoom
    Student sharing his latest project
    Each week during our live session we also saved time for sharing. We felt that this was the most important part of our synchronous time together, and made sure that anyone that wanted to share their work was able to do so. We gave students screen sharing rights, and each time it was someone's turn to share, everyone else turned their mics off while the presenter took a couple of minutes to demonstrate their progress on a project and/or demo a game or story they were creating. 


    Tech Help

    screenshot of technology tutorial videos hosted on class websiteWhile our students had all worked online in some capacity during the regular school year, "doing school" (or clubs) online did require some amount of new tech training. New skills that many students were developing included:
    • screensharing via video conferencing
    • copying & pasting links
    • taking screenshots
    • joining & leaving breakout rooms
    • toggling between multiple tabs in a browser
    • how to send an email (turned on for students in our district about half way through our jump into our emergency distance learning adventures)
    • adding projects to a Scratch Studio
    During live sessions, we could share screens to show students how to do many of these things, and they were great about teaching each other, but for those that missed a session or needed a reminder outside of our live Code Club hour, I also created video tutorials on various tech skills and hosted them in our Google Classroom or on our school's distance learning website.

    I also used a lot of annotated screenshots to show students where particular links, menus, buttons or directions could be found on a website.

    Next Steps for Future Virtual Code Clubs

    Moving forward, I'd like for physical computing to also be an option for our distance learning Code Club students. If we could secure more devices, I'd like to put some type of check out system in place that would allow students the opportunity to borrow and take home a Micro:bit or Raspberry Pi or Makey Makey kit.

    I would also love to find out how we could set up some type of "rent to own" program. I'd do the work or purchasing all of the devices and materials for a "making kit", and families that may not have the resources to buy their own computers for home would be given the option to purchase the kit from the school, or make payments over time, so that they could keep it and continue physical making at home beyond our Code Club time.

    Sunday, April 19, 2020

    Animal Crossing pixel art & math

    Alright, it's official... I've jumped onto the Animal Crossing bandwagon & I love it! I just started playing a couple of nights ago and after having seen numerous posts on social media about all the customizations in the game, the thing that I was most excited to do upon setting up my avatar that first day was to draw my own t-shirt design.

    It didn't take long, while we were drawing out my first design on that coordinate grid, for my fiancé (also a teacher) and I to start commenting on how fun it would be to have our students create some pixel art that we could dress our avatars in.

    And so, I dug around my Google Drive, pulled up the pixel art template that Eric Curts shared out several years, and converted it into an "Animal Crossing Pixel Art" activity for our students. This week's assignment-- create some new t-shirt art for Ms. Haughs's avatar, practice a bit with fractions & area, and submit for the chance to be featured art on Ms. Haughs's Animal Crossing island!

    BONUS-- once my students turn in their spreadsheet art/math, they'll receive the link to an online Animal Crossing Pattern Tool where they can turn their final art into a QR code that will allow me to simply scan and upload their design into my account.
    https://acpatterns.com/editor

    Want to do something similar with your students? The spreadsheet template is below. 
    Simply "File --> Make a Copy" and edit/customize/share away!


    Saturday, April 11, 2020

    Sifting through the noise re: "distance teaching & learning"

    As my county gets ready to embark on our fifth week of shelter-in-place, our fourth week of school at home, and our first "official" week of "distance learning & teaching" (even though some of us have been engaging with our students for four weeks already...) I notice a lot of advice, complaints, commiserating and reprimanding happening all over social media, from both teachers and parents alike. People have a lot of opinions about the role of education at this time.

    Most recently I ran across a lengthy, emotional post on Twitter by a well-followed individual who shared her dismay at the lesson plans that her elementary-aged son's teacher was sending home, noting that teachers should not be sending worksheets home because her family was just to busy to teach and work from home, and, in her opinion, her son learned reading and sciences and math at home just fine on his own or from his parents... so she also let her son's teacher know that he would not be participating in school for the rest of the year.

    I have also been inundated with tweets by educators about what students need at this time. Our students need routine first, our students need to connect with their teachers first, our students need to focus on family time first, our students need... and the list goes on. Messages about what we should be doing, about what we shouldn't be doing, and about how we should be doing it.

    What I struggle with is not that anyone is wrong, per se. It's the one-size-fits-all messaging. A lot of these opinions about what students need right now are just that-- subjective opinions. What would be wonderful to see is what each of us learning when we asked students what they need. Or asked their families what they need.

    These are, as they say, unprecedented times. We cannot presume to know what "all students" need right now, but what I can say is that, just like in our classrooms, all students likely need something different.

    In addition to scheduling live face time with our students via video in the last several weeks, our teachers have also scheduled live face time & phone call opportunities for parents and caregivers. We ask them how it's going at home, what they need, what learning looks like for them right now, and what questions they have for us. Each time we meet with parents the consensus about learning at home is that there is no consensus and we're all overwhelmed.  Every household is different. Every family has different needs and wants.

    Some opt out of work because they do, indeed, just need some family time right now. Others relish the suggested lesson plans and assignments coming home because they want some type of daily structure for their kids. Others are health care workers, gone all day, with no time for school work. Some have children who are already reading 2 & 3 grade levels behind and are panicked about school being out the rest of the year. Others work several jobs, don't have access to technology at home, are raising several kids under the age of 10 and spend most of their day trying to figure out how to get to school to pick up free lunches and to borrow a Chromebook.

    As for our students... some are indeed missing their teachers. Some are missing friends even more. Some are enjoying the novelty of having their parents home all day. Some are missing having school as a safe place to go every day. Some students are doing just fine self-directing their learning at home because it's what they love to do. Others push back every time someone at home asks them to sit down and do a math lesson. No situation is exactly the same.

    So what do our students need during sheltering-in-place and "distance learning"? Unfortunately, I don't think there's one simple answer. I think we continue to check in with families and do what we can to support each of their unique needs. I think we check our expectations of students at this time because this isn't normal for anyone. I think we try to rethink what our roles are as educators, and what learning looks like. I think we just continue to do our best, and I think we continue to figure it all out as we go.

    Sunday, February 23, 2020

    "Tomato Pi" & "Scarecrow Pi"-- Raspberry Pi in our urban garden

    Last summer my fiance and I got really excited about gardening and raising vegetables on our back patio. We have a really nice sized garden bed that my dad built for us and over the course of a couple of months, we were getting some really nice growth out of the tomato bush and peppers that we had planted. Unfortunately, we noticed that one of our tomato plants wasn't growing as well as we hoped and we discovered the local urban wildlife was enjoying the fruits of our labor before we ever had a chance to. So I decided to get making and see how we could use the Raspberry Pi to help us with our urban gardening challenges.

    **The programs that I used for the "Tomato Pi" and the "Scarecrow Pi" are embedded below at the end of this post.

    Project #1: "Tomato Pi" soil sensor

    capacitive sensor
    Our first task was to make watering our tomato plant more efficient and accurate for a better fruit outcome. Inspired by the Raspberry Pi agricultural work of Chris Regini and Melanie Shimano, I jumped online and purchased some inexpensive moisture sensors and got to playing.

    While shopping, I discovered that there are two types of moisture sensors you might use with your Raspberry Pi or Arduino-- a double-pronged resistive sensor that outputs both digital and analog data, or the capacitive sensor that outputs only analog data. I'd read numerous blog posts stating that the resistive sensor was prone to corrosion when left in soil over time, so I purchased a couple of capacitive sensors, which sounded as if they would hold up better if left in the soil for an extended period of time.

    However, if using a capacitive sensor you will also need to use some type of analog to digital converter, as the Raspberry Pi does not include an analog pin. You can purchase an MCP3008 analog to digital converter pretty cheaply for the project (great instructions on how to do this on Maker.Pro website), which I did, before also realizing that my Explorer HAT Pro also has an analog to digital converter pin. Using the Explorer HAT Pro and accompanying python module made it SO easy to set up the moisture sensor!

    email notification from Tomato Pi
    The final step was testing the sensor to determine what values meant good soil moisture, too little moisture or too much moisture. We also programmed the Pi to send an email every 6 hours with a soil moisture update so that we knew whether we needed to go out and water or leave the plant alone.

    While I still have to up my "packaging game" (I know this set up isn't the fanciest or prettiest) we were pretty happy with the results and reliability of the sensor.


    Project #2: "Scarecrow Pi" motion-activated wildlife camera & scarecrow

    One of the major annoyances of having an urban garden is discovering that the local birds and squirrels are getting into our vegetables before we are! So I decided to play with some automated solutions to our garden pest problem.

    Building off the idea of wildlife cameras, I first put together a motion-activated camera to capture the culprits in action. (Really I wanted to use a distance sensor so that the camera would only go off if an animal got within a certain distance of our planter box, but I haven't yet got one to work so...)

    I also wanted to incorporate some type of scare tactic to keep animals out of our plants (without hurting them!), so I decided on the servo motor. And while the scarecrow itself doesn't yet look like a scarecrow (I'm thinking I'll hire a student to build me a better looking scarer), shiny materials are said to keep birds away so as far as we can tell, having the motor shake shiny paper in front of the birds when they set off the sensor seems to be working just as well.

    In order to run our "scarecrow" headless I also programmed the Pi to autostart the program on boot, and I programmed a "shut down" button so that I can shut down properly when I need to. As for power, I'm currently running the Pi on a solar powered battery pack-- although I'm thinking about just running an extension cord to the garden box as the battery, even though solar powered, doesn't tend to last more than a day. I still need to track down some of these batteries that I've seen others use more successfully for multiple days.

    I still need to adjust the sensitivity of the motion sensor, and my next steps will be to update the camera to take video and stream online, but in the meantime, this is definitely doing the trick!


    Tomato Pi code:


    Scarecrow Pi code:


    Learning resources:

    Soil moisture sensor

    https://maker.pro/raspberry-pi/tutorial/interfacing-soil-moisture-sensor-with-raspberry-pi
    https://www.element14.com/community/community/raspberry-pi/raspberrypi_projects/blog/2017/08/23/iot-garden
    https://gpiozero.readthedocs.io/en/stable/api_spi.html#spi-keyword-args
    https://cdn-learn.adafruit.com/downloads/pdf/reading-a-analog-in-and-controlling-audio-volume-with-the-raspberry-pi.pdf
    https://learn.sparkfun.com/tutorials/soil-moisture-sensor-hookup-guide/all

    With ExplorerHAT Pro

    https://github.com/pimoroni/explorer-hat/blob/master/tutorial/welcome-analog.py

    Shutdown button

    https://core-electronics.com.au/tutorials/how-to-make-a-safe-shutdown-button-for-raspberry-pi.html

    Servo motor (for moving scarecrow)

    https://gpiozero.readthedocs.io/en/stable/api_output.html
    https://projects.raspberrypi.org/en/projects/grandpa-scarer/3